Why use images on your blog
Diversifying your content with imagery is important for many reasons. First, it enhances the reading experience and makes your content more appealing. Second, imagery can greatly improve blog performance as well as its ranking on search engines. Let’s take a closer look at the main advantages of using visuals:
- Images are great at attracting users’ attention and growing your blog traffic. Thus, they generate 12% more traffic, while an increase in shares and engagement can even double it.
- Visuals are a great means to evoke feelings and associations, which help readers remember the information longer. Thus, if you want the audience to take home something from your posts, make sure to spice them up with pictures.
- It helps highlight product benefits. With high-quality images, you can make an offer look much more appealing and increase conversions by as much as 80%. For example, illustrate a travel guide with photos of relaxed and happy tourists to convey that emotion to readers and encourage them to book.
- Images make the reading experience easier. Try to avoid publishing walls of text that require more effort on the readers’ part. It’s important for both light topics to convey emotion and more complicated content to facilitate understanding.
- Concise screenshots can make your instructions clearer and spare you from over-explaining.
- With images, you can leverage different methods of communication and learning styles.
- Blog posts with images can also appear in image search results, which will increase the chances of your post being found by users.
- Finally, it’s one more opportunity to use keywords and improve your blog ranking. You can incorporate relevant keywords in file names, alt tags, image captions, and so on.
8 types of visuals for blog posts
Make sure to combine different kinds of images to make your blog content more appealing and illustrative. For example, screenshots can help guide readers through the booking process, while infographics are perfect to make complex information more accessible. Here are the top eight types of images to use on a blog.
1.Stock photos
Stock imagery is often the first choice when bloggers want to illustrate their content but don’t have high-quality photos of their own. Stock photo websites contain thousands of images that professional and amateur photographers upload and can help illustrate a variety of topics. What’s more, such images can be free to use, which is especially important for aspiring writers without much budget.
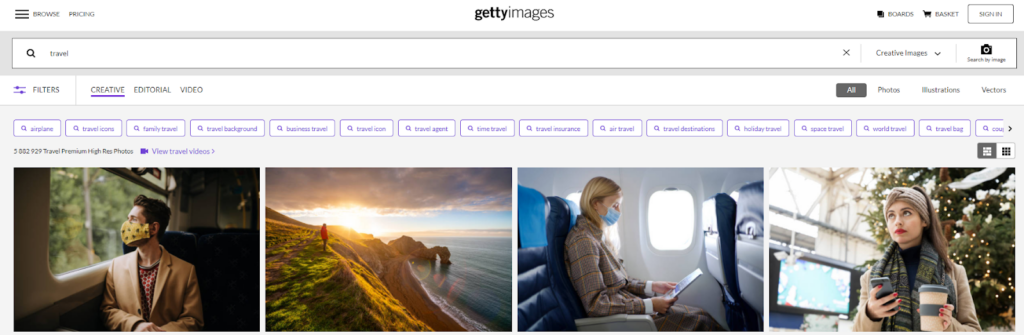
However, not all the content on stock platforms is free, so make sure to check licencing for each photo you download. For instance, purchasing a royalty-free licence allows you to use pictures multiple times, while rights-managed images require separate payment for each use of a photo and even specify the time period.
2.Screenshots
Screenshots are excellent for illustrating educational content, such as how-to guides, instructions, and so on. For example, if you want to teach users how to book a hotel, make sure to include screenshots of all important steps of the process to make it easier and encourage bookings.
The nice thing about screenshots is that they are free of charge and can also be of high-quality with the right tools. Check out Awesome Screenshot, Clipular, or Lightshot—these Chrome extensions allow you to take and edit screenshots right in the browser. With Skitch, you can blur elements on the screenshot to hide irrelevant details. Snagit and Jing have even wider functionality and can take full-page, scrolling screenshots as well as screen record a video.
3.Infographics
Using infographics is beneficial for bloggers in so many ways. First, this type of content always attracts attention and generates shares and backlinks, which in turn helps with traffic. Second, infographics allow you to explain complex matters more easily and enhance reading experience. You can use it to:
- Visualize statistics
- Provide a summary of a process (step-by-step guides)
- Present location-based or demographic data
- Compare options
- Share lists, be it resources, tips, links, etc.
With the best infographic tools, you don’t need to have a background in design to create content. Such programs offer tons of templates that you can customize, whether you need a graph, chart, map, or list, and there are many sources offering design tips for each kind of infographic. Some tools also allow you to create video infographics, which is more complicated, but efficient.
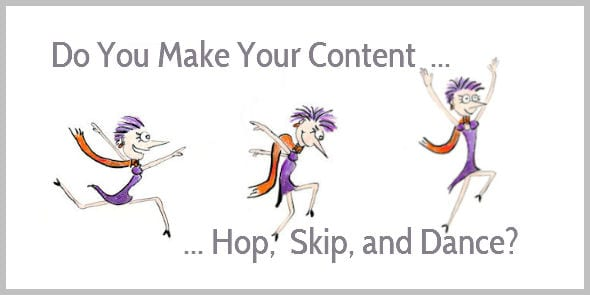
4.Hand-drawn pictures
While hand-drawn pictures are harder to create, they also are very efficient for increasing blog traffic and the number of shares. Some bloggers use hand-drawn pictures of one consistent style throughout their content to give it a personal touch and improve brand recognition.
You can draw pictures yourself with the tools like Photoshop, Affinity Designer, Rebelle 3, Procreate, Krita, and more. If you don’t have good drawing skills, consider hiring a designer. You can do it on freelance platforms such as Upwork, Fiverr, Freelancer.com, order it directly on designer software like Canva, or browse sites with hand-drawn pictures for sale such as Etsy.
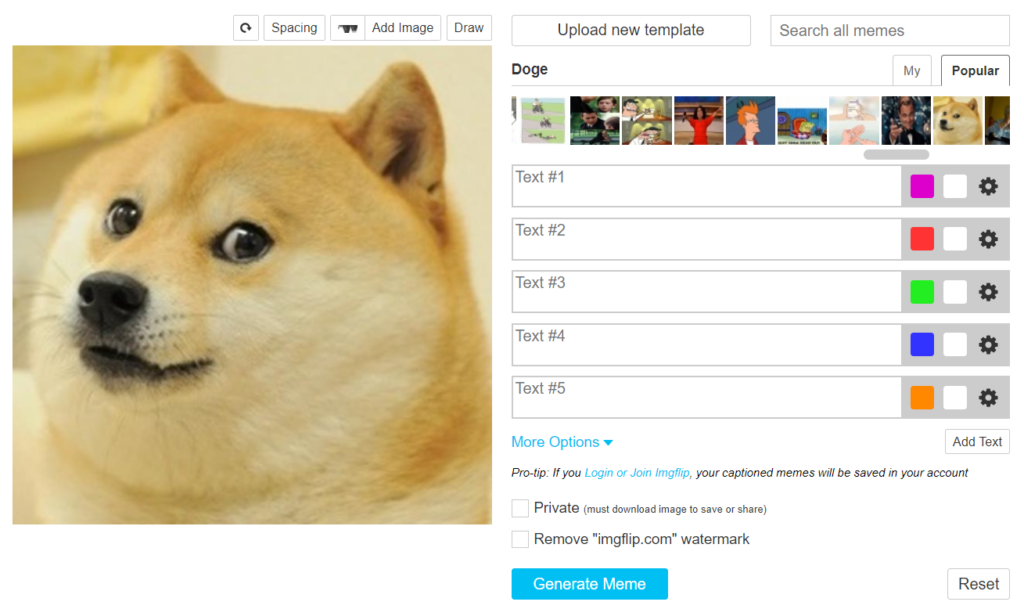
5.Memes
Your content doesn’t always have to be serious. Why not make your readers smile with relevant memes? You can easily make one within a couple of minutes—just upload a picture and type in the text. There are a number of free meme generators, such as Canva, imgflip.com, Kapwing, etc.
6.Quote images
Another type of visual content is quote images. Take a sentence that you find inspirational or thought-provoking and turn it into a quote. The right background can help convey the emotion and attract attention.
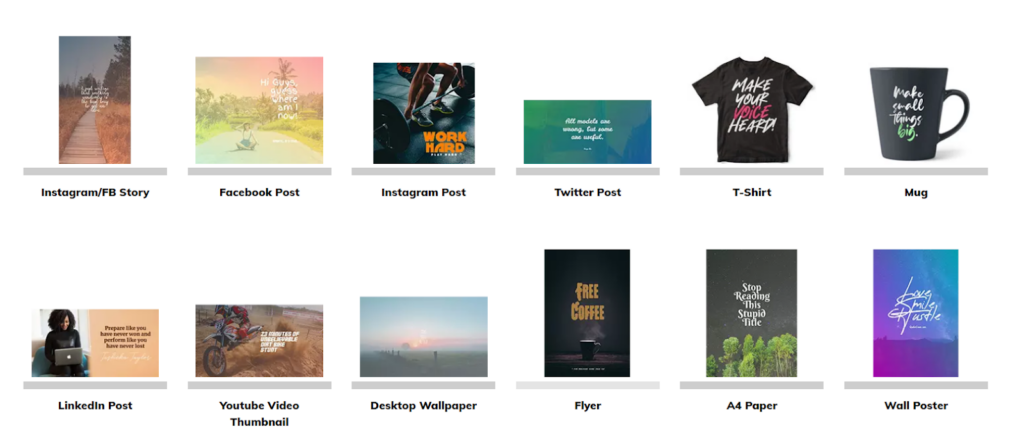
There are plenty of free tools to make quote images such as QuotesCover, Quozio, Canva, PixTeller, and more. Upload a photo or choose a template from the library and add your text. You can also choose the dimensions of your image. Some tools like QuotesCover offer various kinds of image sizes based on their purpose, for example, Instagram Stories, Youtube video thumbnail, or wall poster.
7.Gifs and animated graphics
Animated content takes more effort to create but it will also help you stand out and catch the attention of users. It can spark interest much better than other types of imagery and is also great at explaining concepts. Gifs are usually small files, which you create from images or a video. You can make a timeline of photos or choose part of a video and turn it into a gif. Here are a few great tools that will let you make animated content:
- ezGIF is a simple and free GIF maker, which allows you to create GIFs from images or videos.
- Crello is a free animation maker that offers thousands of animated templates and allows you to resize posts and download them in different formats such as animated posts, video stories, etc.
- Placeit is a comprehensive design software for creating animated logos, slideshows, Instagram Stories and other animated content.
- Imgur is a simple and free tool to create GIFs from images or videos.
To illustrate how-to guides and tutorials, sometimes it’s efficient to make GIFs of your on-screen activity. Such graphics can be a more relatable example than usual images and are also great at growing backlinks. Check out tools like GIPHY Capture, Screentogif, GifCam, and others.
8.Presentation
Presentations and slides can also do well as visual content for your blog posts. First, you can use slides from your webinars, if there are any. Readers might not have time to watch webinar recordings fully, but they’re likely to look at a few slides for an overview. Second, one can present complex numerical data or survey results as a slideshow. While PowerPoint is often the first thing that comes to mind, there are plenty of tools that go beyond the classic presentation experience:
- Keynote is a free tool for owners of Apple devices. It is similar to PowerPoint and is known for its beautiful templates and smooth animations.
- Visme offers tons of templates and slide types as well as a variety of icons, royalty-free images, and graphic elements.
- Prezi allows you to create unique movement between slides on an open canvas, which offers greater design freedom.
- Ludus is a great solution for those who want to take their presentation to the next level with advanced design features and third-party integrations.
How to optimize images for SEO
Adding images to your blog content is also crucial for the purposes of SEO. First, image optimization for Google provides it with contextual information and helps you better understand and categorize your posts. Second, as images are attractive for users, the latter stay longer on your site, and higher user engagement improves your site ranking on Google.
Below, we’ve gathered some of the SEO image best practices.
Name images with keywords
Keywords are one of the pillars of search engine optimization, and they are one of image ranking factors. Thus, you can include keywords in image names. Ideally, file names should be comprehensive for both search engines and people, so try to choose a descriptive title and avoid gibberish. Also, separate words with hyphens and not underscores, as search engines don’t recognize them.
Use alt tags
Alt tags or attributes are used to describe an image and what it represents. Unlike image description, alt tags cannot be seen by users on the web page unless the image doesn’t load, but they are visible for search engines. Alt tags serve many purposes: first, they provide context for Google to index your visual content; second, they allow visually impaired users with screen readers, those who turn off images in their browsers or who use text-only browsers.
When writing alt tags, aim for 10 to 15 words. You can include more details than in the file name here, which will help users understand your image content if it doesn’t load. You can also include keywords for images in their alt tags but try to avoid keyword stuffing so you don’t look spammy to Google.
Add image description
Image descriptions may not directly affect SEO, but they still give you a chance to add keywords and improve the user experience. In general, captions include around 150 characters and are placed below the image on the page.
Pick the right format
There are plenty of different image formats, and each has its benefits. To choose the right one for your image, think of what’s important to you, like, saving space, improving load time, etc.
Let’s now a look at the most popular image formats:
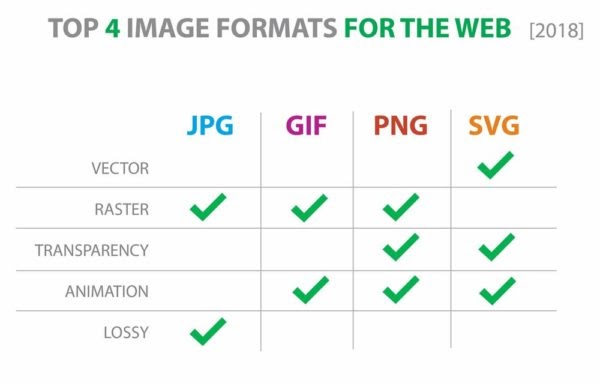
- JPG/JPEG is one of the best SEO image formats: it takes up little space, supports millions of colors, is quick to upload/download and is the default format for many digital cameras and smartphones. However, during the compression, this file type can lose data, and it doesn’t support transparency.
- PNG is a good fit for more complex images with larger file size, and it doesn’t lose any data during the compression. Consider using PNG when working with detailed images or files that are still being edited. PNG also supports animation and transparency.
- GIF is usually used for animated images but it doesn’t include audio. GIFs are smaller than JPEG or PNG and can only support 256 colors.
Briefly, use JPEG for images if you want to speed up page load, PNG for high-quality images where you don’t want to lose any details in case of compression and GIF for animated graphics.
Comply with the license
When filling in your content with images from the internet, it’s important to check its license and understand the restrictions that it imposes. Otherwise, you can violate the copyright and risk a lawsuit.
Here are four of the most popular image licenses that you can stumble upon on the internet:
- Royalty-free images can be used multiple times upon purchase and are usually cheaper than other types of images. Normally, you can find royalty-free images on platforms like Shutterstock or iStockPhoto.
- Rights-managed images are usually high-quality and professional. License is available for purchase for a specific use, time period and geographic area, and nobody can use your image until your license expires.
- Creative Commons license allows for free use of images. However, it can impose some restrictions, and you need to ask the creator for permission in cases not provided for by the license.
- Public domain images are available for public use without restrictions, though providing attribution is still recommendable.
Reduce image file size
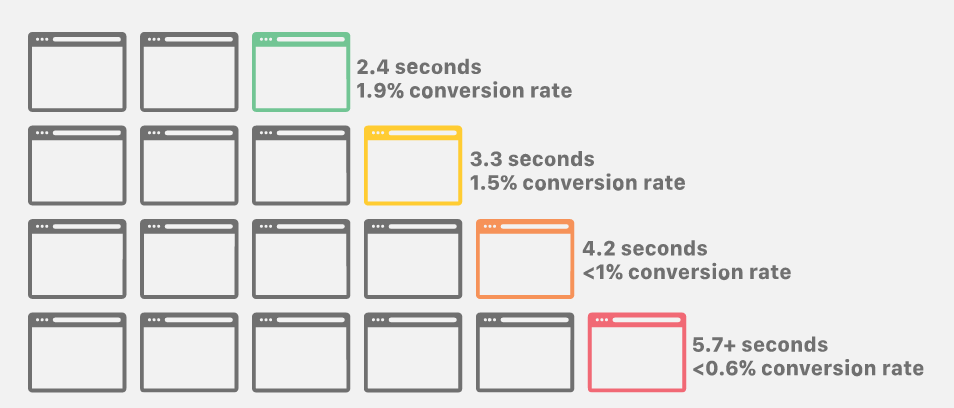
Page load speed greatly influences your blog performance, as 40% of users leave a site that loads for over 3 seconds. By improving user experience, you’ll also increase your search engine rankings, which in turn will bring you more traffic.
For all of that to happen, it’s important to optimize the size of images on your blog so that they take up less storage space and allow for faster site backups. Here are some of the tools that allow you to reduce image size for SEO without losing quality:
Customize the image
Sometimes images just need a touch here and there to stand out and draw attention. With these simple tricks, you can make any of the images found on the internet look compelling and complement your blog content.
Customize the color
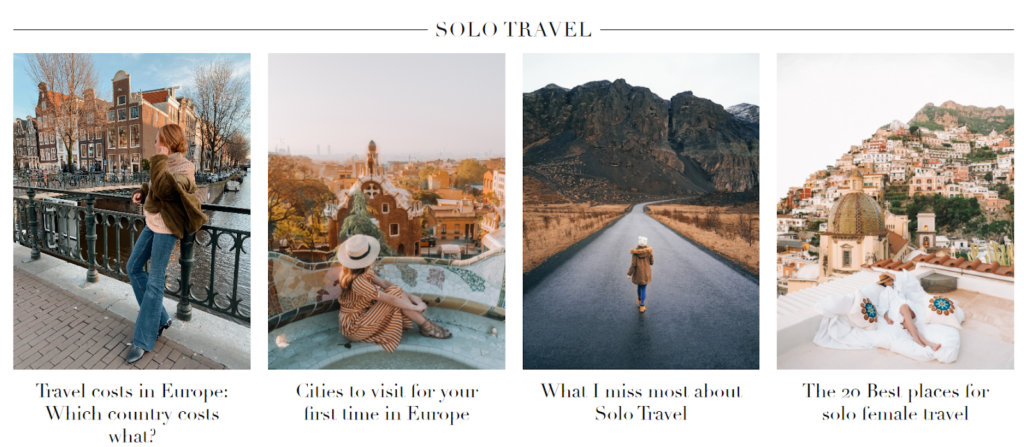
If you use a lot of stock images from different photographers, editing can make them look cohesive and harmonize the overall tone of your visual content. For example, you can add filters or a colorful ombre gradient. Another creative solution is to keep only a part of an image colorful to focus the user on a specific element.
For example, on the World of Wanderlust blog, you can see that all photos have similar touch, which makes the content look unified.
Make a collage
In some cases, putting together a collage of several photos can tell the story much better than a single image. In this way, you’ll have more control over their placement and don’t have to worry about layout. What’s more, collages do well on Pinterest and other networks and attract social traffic.
Using online tools like Ribbet, Pixlr, and Photovisi allows you to create collages within minutes, as you choose a template and upload photos. With Canva and PicMonkey, one can make free-form collages.
Add text and other elements
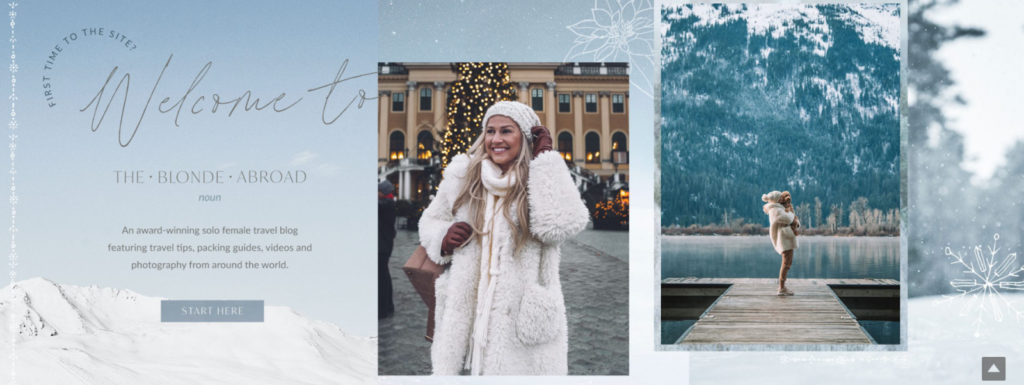
Make your images look cohesive by adding special elements. For example, you can place a frame or border to give images a defined edge, which can be a good idea for screenshots. You can also add text to make pictures more descriptive. The only thing is here to not overdo with adds-on.
Here is a nice design example from The Blonde Abroad blog.
How to use images on your blog
Mixing up different types of images for your blog can help achieve many objectives. To make content more illustrative, add screenshots to your educational content. To convey complex information and acquire backlinks, make sure to post infographics and graphs. Hand-drawn and animated images will help you increase the engagement, and so on. Whatever images you choose, be sure to optimize them to not slow down your blog.